This year we finally caved and got a pet - an adorable British Shorthair kitten! Of course, being a knitter and crocheter, I could not fathom not making anything for our new family member. Given that cats generally hate clothes, I decided to make something that our kitty was actually going to use - a cat bed!

And it turned out a huge success. Not only our cat uses it daily, but he had been trying to use it even before it was made :).

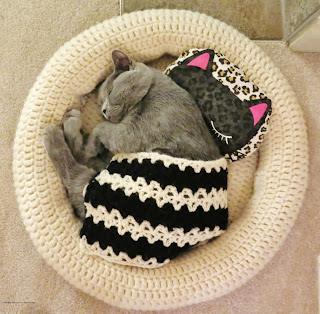
This project was also an exercise in recycling and upcycling - a very special and very custom (!) cat pillow was made from my daughter's old pajamas (photo courtesy of Children's Place).
 The yarn came from an old project that was inherited from another family member.

I used all yarn pretty much to the last inch, making a tiny 'blanket', which compliments the whole set quite well.


This is how the pet bed looks when crocheting is finalized:


And it turned out a huge success. Not only our cat uses it daily, but he had been trying to use it even before it was made :).

This project was also an exercise in recycling and upcycling - a very special and very custom (!) cat pillow was made from my daughter's old pajamas (photo courtesy of Children's Place).


I used all yarn pretty much to the last inch, making a tiny 'blanket', which compliments the whole set quite well.

I am happy to share a free pattern of this pet bed with anyone who wants to make a similar one for their beloved fur babies.
Fluffy Dreams Pet Bed

This pet bed was made to accommodate
a regular size cat but can work for kittens and small to medium dogs or other
animals. It measures roughly 50 cm across including the rolled sides (red line
on the photo) and 38 cm between the rolled sides (green line on the
photo).

If
you’d like to create a felted bed, you may need to increase the size (which includes
increasing the width of the foundation and the height of the side part).
Materials:
·
Size 8 mm crochet hook
·
Bulky or super bulky weight yarn that yields
required gauge (amounts may differ depending on the brand. For this project
about 400 g of yarn was used).
·
Synthetic polyester stuffing or any stuffing
that can withstand washing
·
Large sewing needle that can accommodate the
matching yarn.
Gauge:
9 double crochet stitches - 10 cm
5 double crochet rows - 10 cm
Description:
This pet bed is worked in a circle in rows of single crochet stitches. It consists of two parts – the foundation and the side.
9 double crochet stitches - 10 cm
5 double crochet rows - 10 cm
Description:
This pet bed is worked in a circle in rows of single crochet stitches. It consists of two parts – the foundation and the side.
Foundation:
The foundation part is worked in
a circle with regular increases to create a desired shape.
R0: Crochet
6 CH ST and SL ST in the first CH ST to close the ring.
R1: Crochet
3 CH ST and crochet the following in the ring: 1 DC, *2 CH ST, 2 DC*, repeat
from * to * 5 more times, 2 CH ST, SL ST to join the first DC and close the
ring. There should be 6 segments (1 segment of 3 CH ST and 1 DC and 5 segments of
2 DC stitches) separated by 2 CS stitches in this row.
R2: Crochet
3 CH ST, 1 DC in the base of the 3 CH ST, 1 DC in the DC of the previous row, 1 DC in the 2 CH ST of the previous row, *2 CH ST, 1 DC in the 2 CH of the
previous row, 2 DC in the 2 SC of the previous row, 1 DC in the 2 CH of the
previous row*. Repeat from * to * 4 more times, 2 CH ST, SL ST to join the
first DC and close the ring. There should be 6 segments (1 segment of 3 CH ST
and 3 DC and 5 segments of 4 DDC stitches) separated by 2 CH stitches.
R3-10: Continue
working in a similar manner, adding 2 DC for each of the 6 segments, separated
by 2 CH ST.
R11: Add
2 DC for each of the 6 segments, which will result in 22 DC in each of the 5 segments
and 21 DC in the segment with 3 CH ST (3 CH ST at the beginning of the row and
131 DC). DO NOT add 2 CH ST between segments in this row. At this point the bed
foundation should measure about 44 cm in diameter.
Side:
The pet bed side part is worked in a circle without increases to create a
desired shape.
R12: Crochet
3 CH ST and 131 BPSC above the DC of the previous row. BPSC will mark the
beginning of the side part.
R13-23: Crochet 3 CH ST and 131 DC above the SC of the previous rows.
Fasten off and break yarn. Weave in the ends. Once finished crocheting, the
side should be about 24 cm in height.
This is how the pet bed looks in the process of being crocheted:

This is how the pet bed looks when crocheting is finalized:

Assembly:
Lay
the pet bed on a flat surface. Thread the needle with matching yarn and start
sewing the top of the side to the R11 of the foundation, so that the resulting
seam is on the inside of the pet bed. As you continue sewing, start stuffing
the resulting hollow tube with stuffing of your choice. Ensure the ends of the
side align with stitches of R11.
Continue stuffing to achieve the desired look and feel of the pet bed.
Once you complete stuffing, secure the thread, cut off the end and weave in the
end.
Should
you stuff it before or after felting? Opinions differ. To ensure the best
result, you can assemble and stuff the pet bed prior to felting, but leave a
little opening in the seam between the side and the foundation if there is a
significant change in the size after felting and you need to add or remove
stuffing.
This is how the pet bed looks after it is stuffed, washed and dried:

Abbreviations (US version):
BPSC back post single crochet
CH ST chain stitch
R row
DC double crochet
SC single crochet
SL ST slip stitch
Wow, beautiful pet bed!
ReplyDeleteThank you for your kind comment!
DeleteI made this bed for my kitties 🐈⬛ and they also used it before it was finished! One in particular seems to really like it. Plan to make another for other kitty!
ReplyDeleteThank you so much for your comment and I am happy to learn your kitties loved your project!
Deletehello, thanks for sharing this! can you explain this part in R2: "*2 CH ST, 1 DC in the 2 CH of the previous row, 2 DC in the 2 SC of the previous row, 1 DC in the 2 CH of the previous row*." What does CH and SC mean? I'm new to crocheting and confused about what R2 would look like/where to put the stitches, thank you!
ReplyDeleteCH means 'chain' and SC means 'single crochet'. There is a list of abbreviations at the end of the pattern description.
DeleteSuper cute, I’m going to make one for my rabbit 🐰
ReplyDeleteThank you for the encouragement!
DeleteGreat
ReplyDeleteThanks so much!
DeleteI really don't get it how the instrutions are meant :(
ReplyDelete"2 CH ST, SL ST to join the first DC" - should I put the hook in both stitches that are close on the ring and make the SL ST with them or where should I insert the hook?
" 1 DC in the DC" - same question again
" 1 DC in the 2 CH ST of the previous row" - in one of the two stitches or where?
" 2 DC in the 2 SC of the previous row" - in one of the two stitches or where?
Thank you for your questions.
Delete""2 CH ST, SL ST to join the first DC" - should I put the hook in both stitches that are close on the ring and make the SL ST with them or where should I insert the hook?" - Yes, you crochet 2 chain stitches, then insert a hook in the stitch from which you started making a ring and join the ring through making a slip stitch.
You can find some examples online how to use a slip stitch to join a ring, for example, here: https://www.youtube.com/watch?v=_Bdz3afi8gU
"" 1 DC in the DC" - same question again
ReplyDelete" 1 DC in the 2 CH ST of the previous row" - in one of the two stitches or where?
" 2 DC in the 2 SC of the previous row" - in one of the two stitches or where?"
Once you created your ring (R01), you will have 6 segments which will widen through addition of extra DCs on both sides of each segment. The base ring starts with 2 DCs per each of the 6 segments. In the next row they must become 4 DCs, in the following row they must become 6 DCs and so forth. To achieve this, you add one extra DC on each side of the segment and continue crocheting DCs straight above the DCs of the previous row in each segment. If you look at the photos, you can see how DCs are positioned.
Hope this helps. Please let me know if you have further questions. In the future I plan to create step-by-step instructions with photos for each row.